

Where did I leave off with this project? I’m very overdue with this post considering the bathroom has been finished for a quite some time. Whoops!
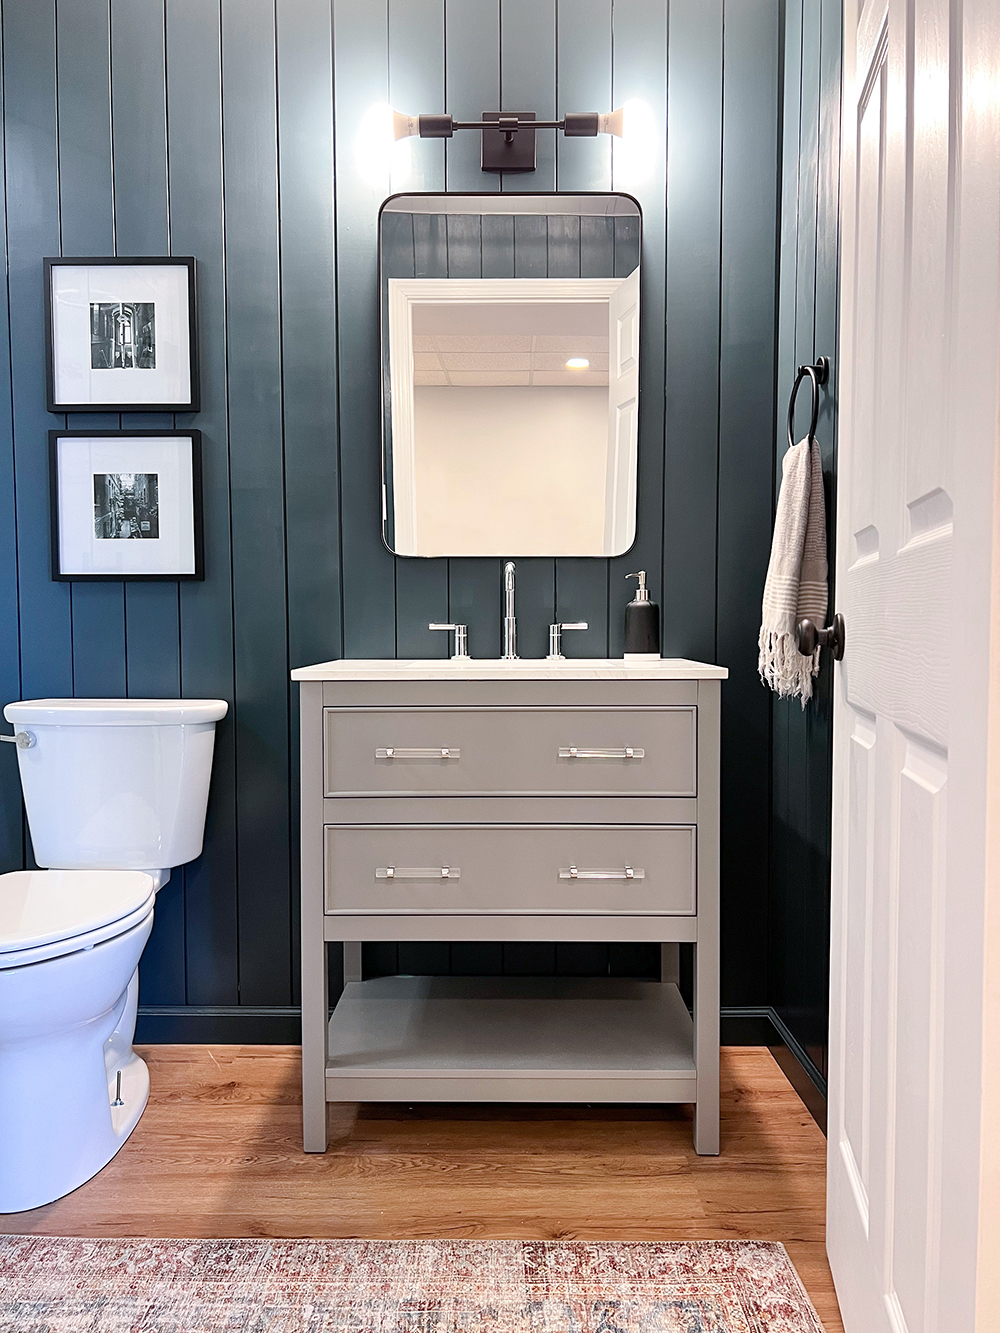
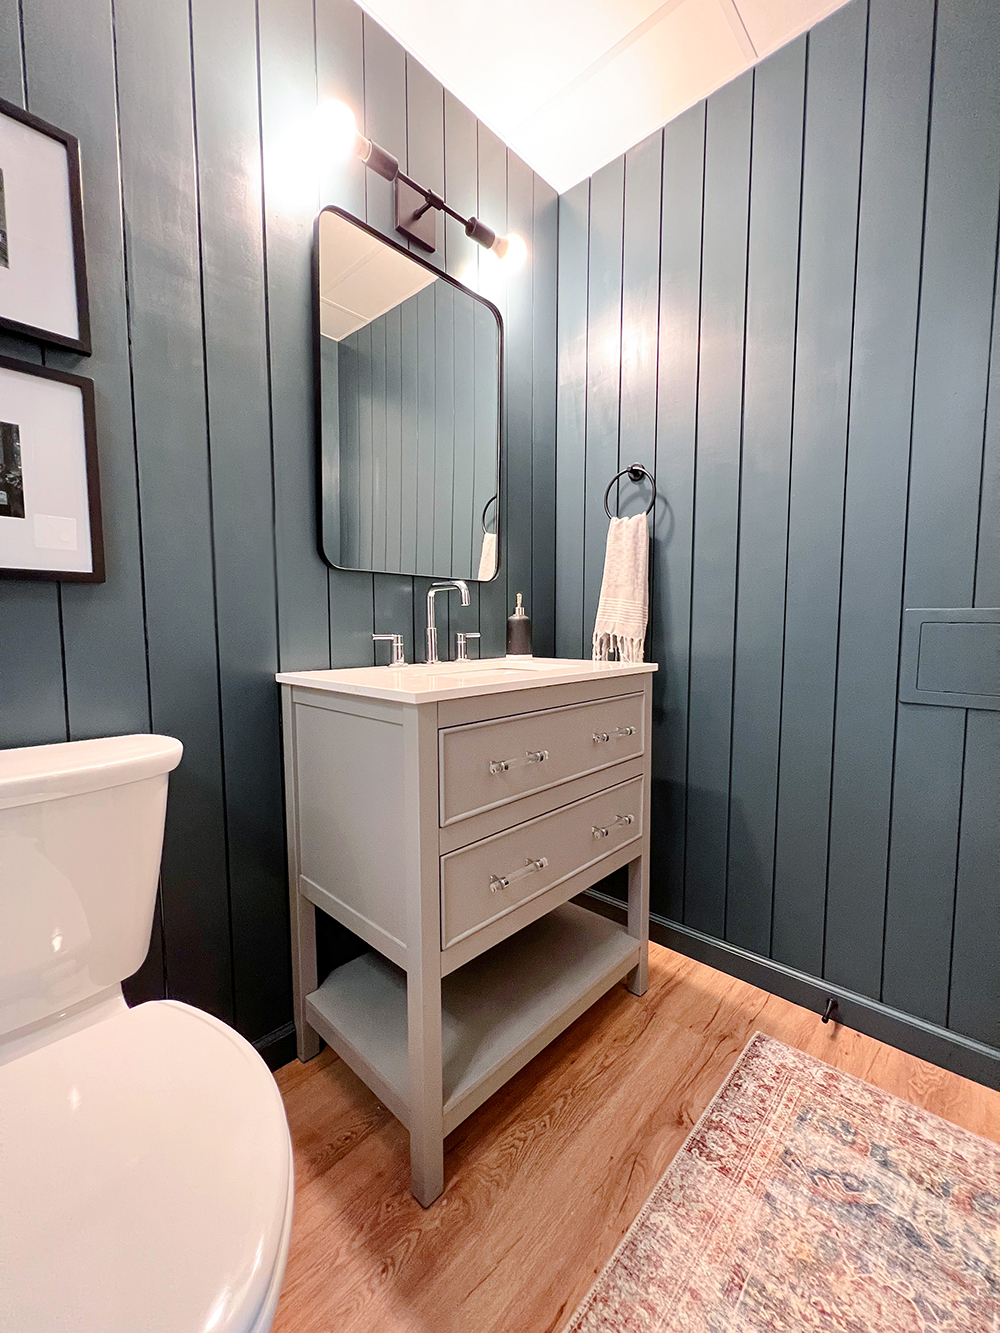
After installing the shower base and waterproofing the shower area, we decided to take a break from the shower while we planned out the rest of that area and made some concrete decisions. We moved on to installing the new drop ceiling, finalizing the vent placement in the shower, finalizing the vanity placement and lastly finalizing the new electric placement. The new vanity is wider so we had to move the vanity light over to be centered and also move the outlet to be closer. Moving those two items plus where we had removed the half wall from the old shower meant lots of drywall patchwork, which is something neither of us are particularly good at. That brought us full circle back to one of the original ideas I had for the bathroom that we scraped early on to save a few dollars — installing vertical shiplap. Which also meant we had to get the paint back out and paint all of the shiplap after we had just painted the walls.
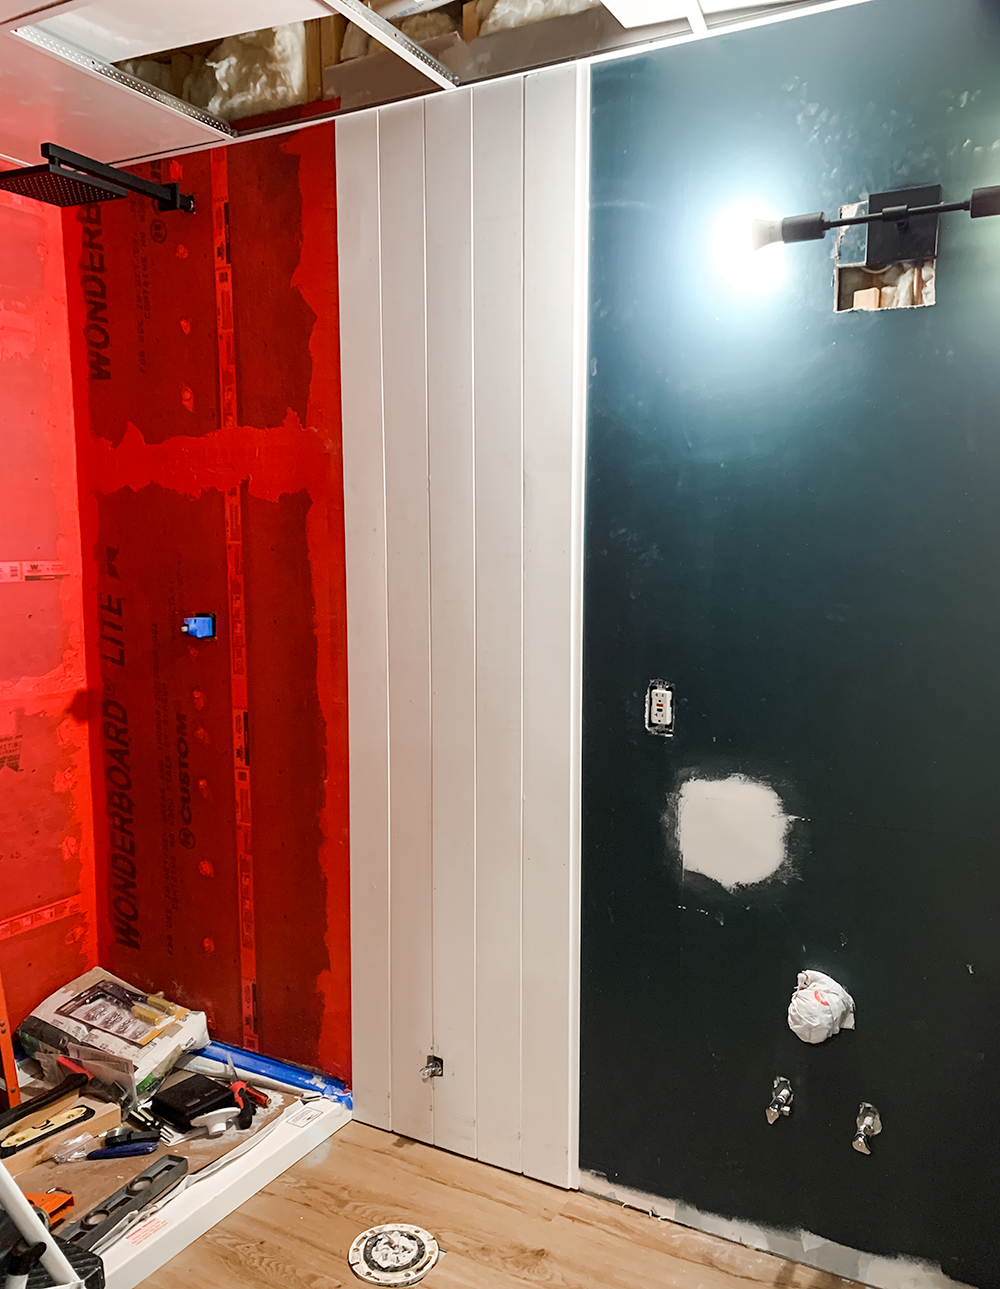
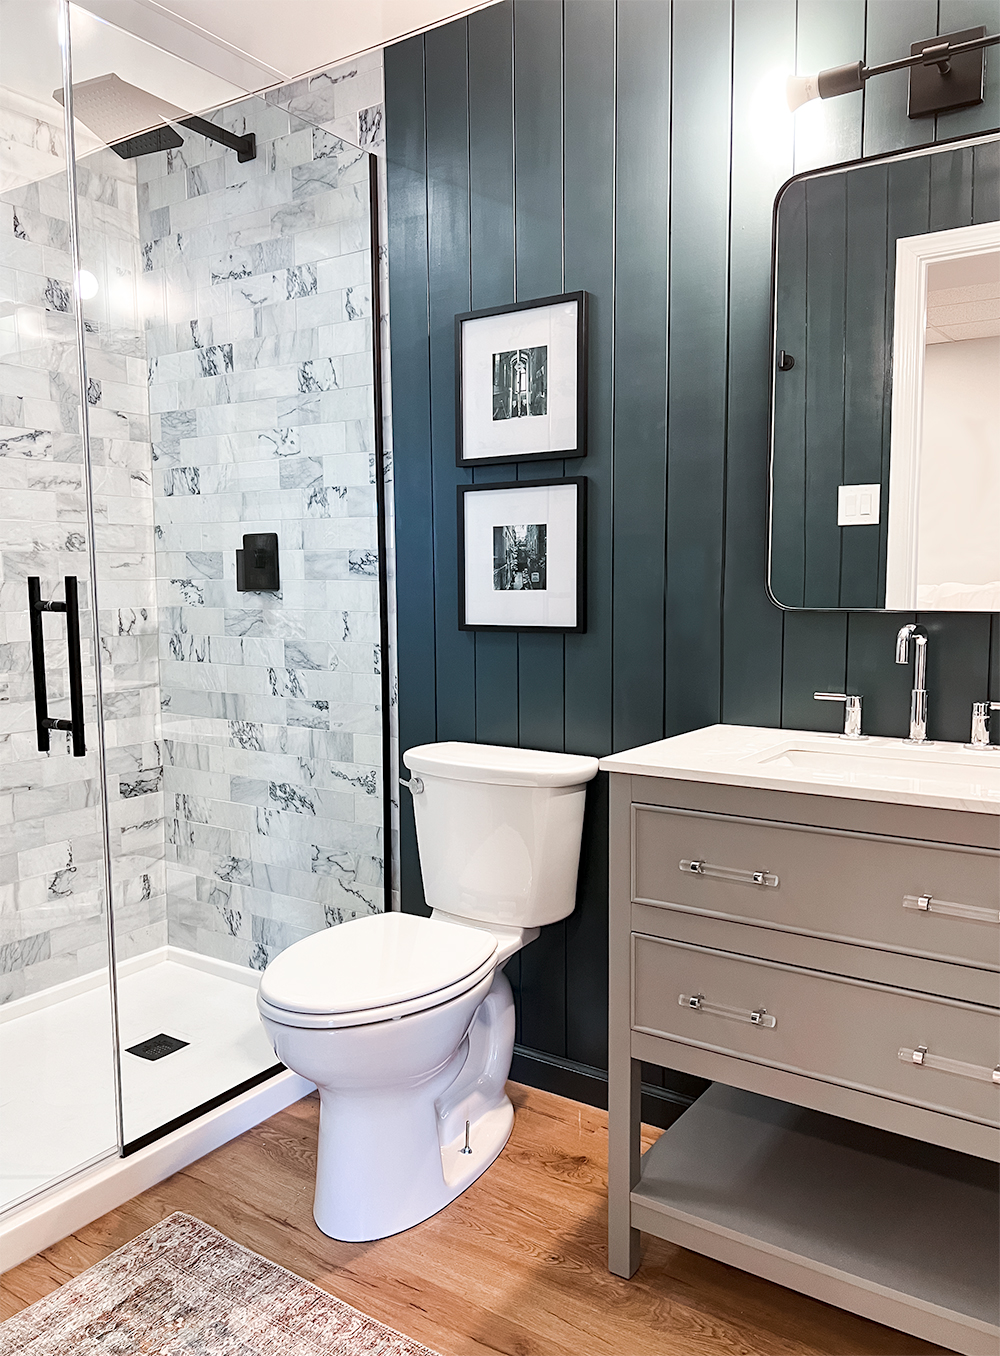
The decision to do vertical shiplap also helped solidify our edge choice for the shower. We had been exploring a couple options in how to finish the sides of the tile – find a finished edge/bullnose tile or buy some metal Schluter edging. The depth of the Schluter edge pieces ending up working perfectly with the depth of the shiplap. So we got to work with installing the shiplap. We used liquid nails to adhere to the wall + a nail gun to secure to studs and also checked every piece to make sure it was level as we installed. I love how it turned out! Adds just enough texture and interest to the room. My one complaint about the shiplap is that the wood has shrank a bit during the cold winter months (as expected with wood) and there were some areas that require paint touch up. Not a huge deal in the end, more of an annoyance.
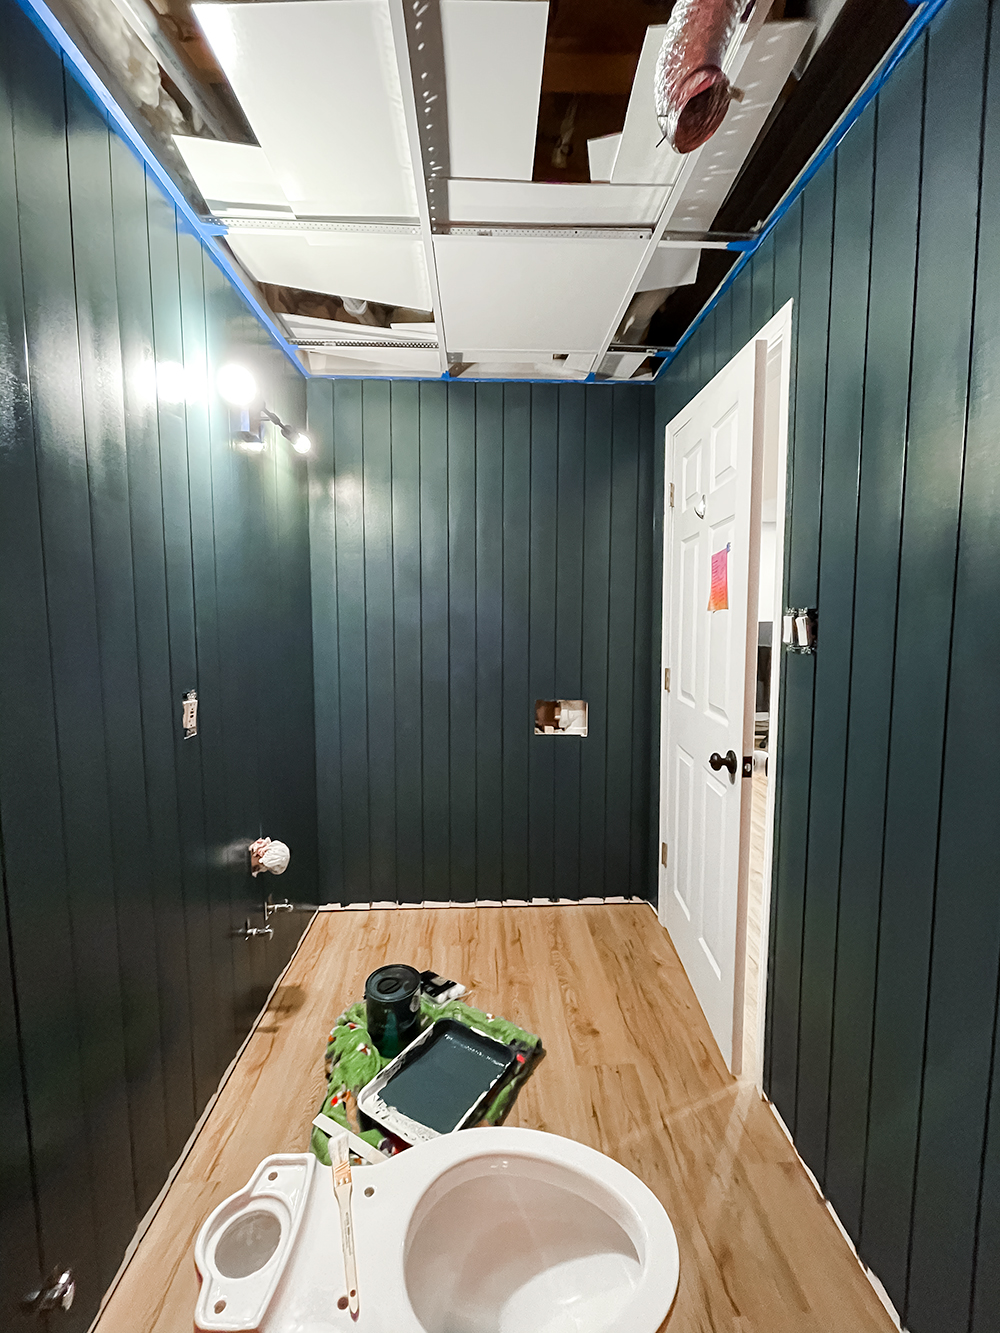
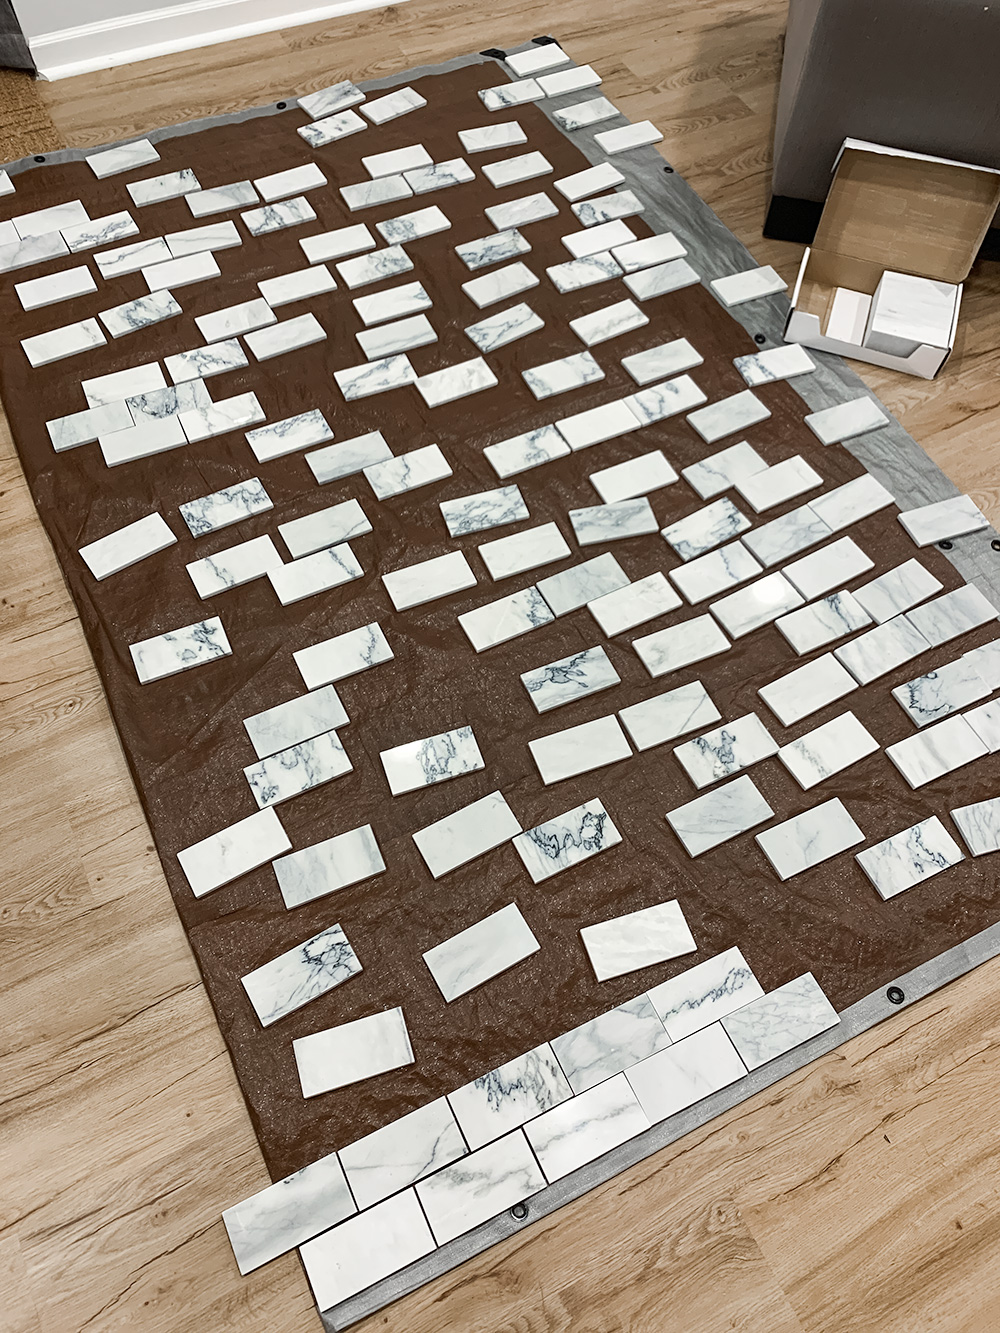
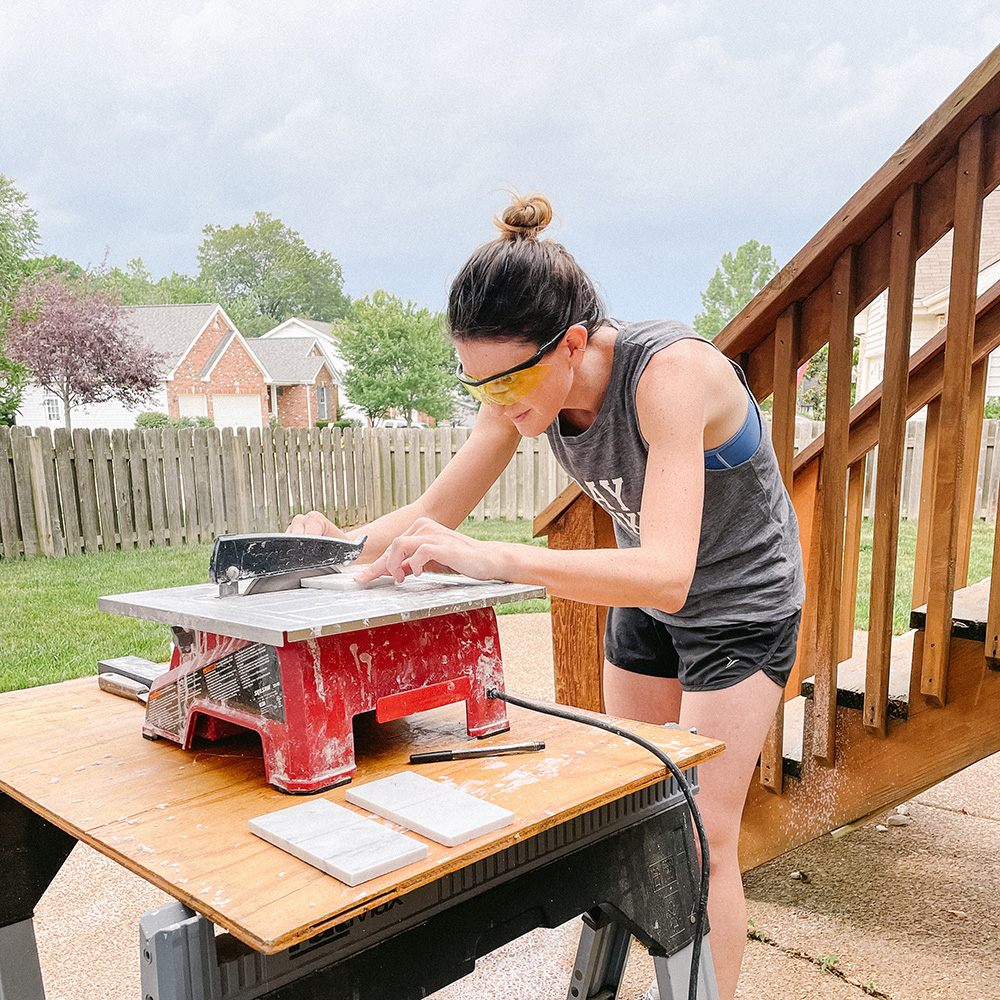
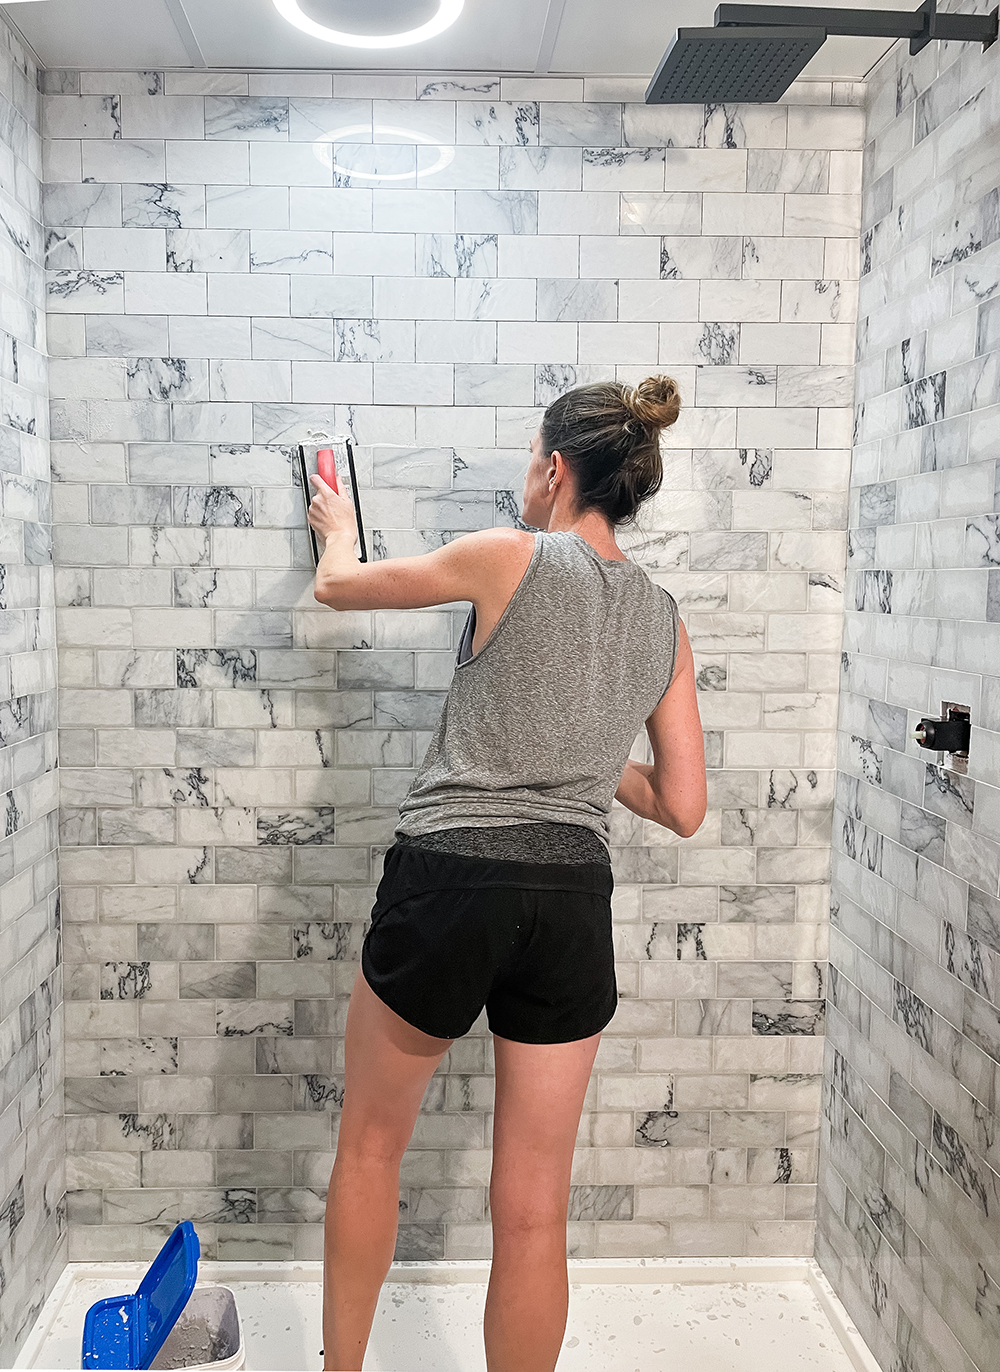
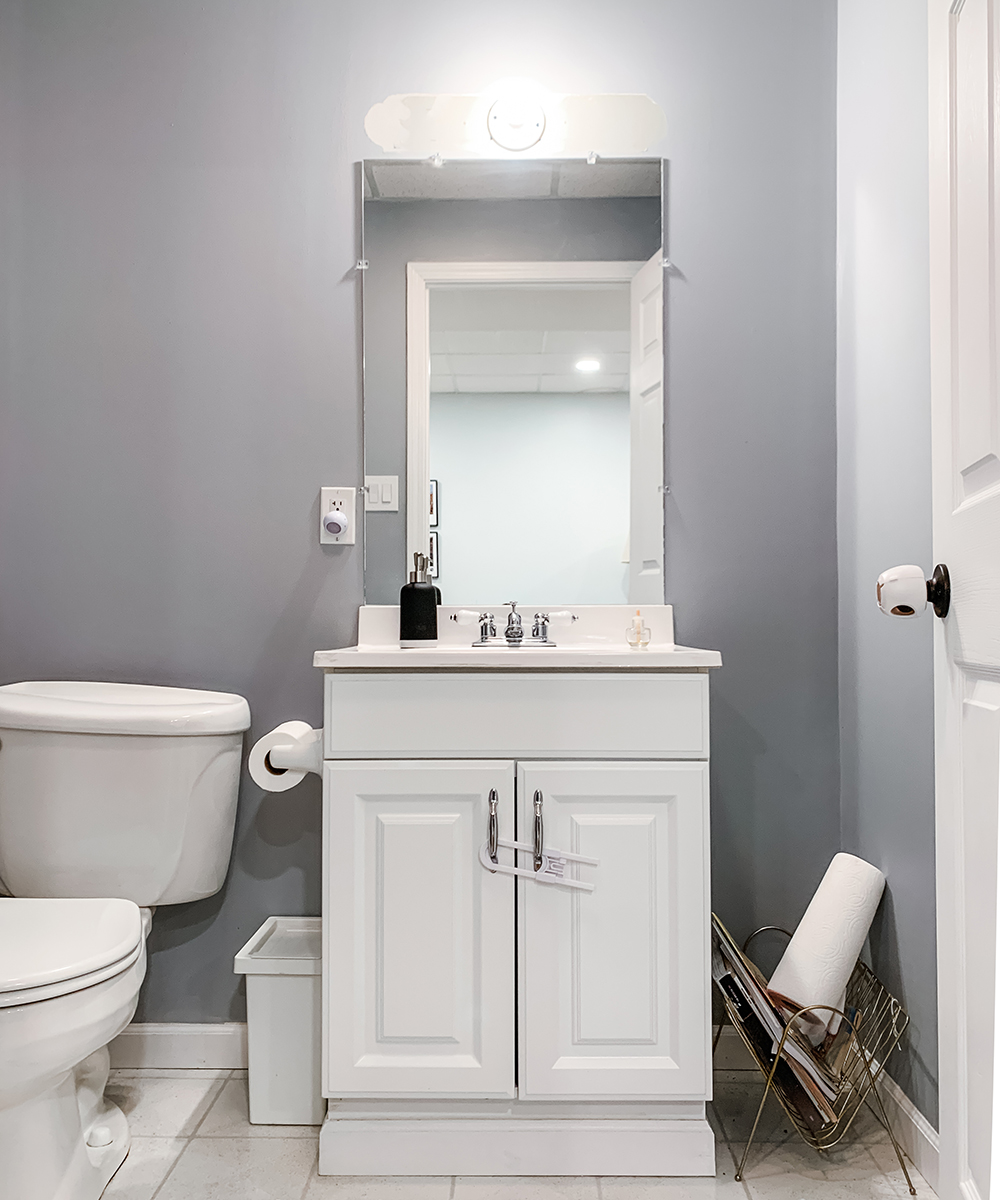
After finishing the shiplap we got the baseboards, sink, toilet, mirror and fixtures all installed. It was then back to the shower. I got out our boxes of marble tile that we picked up for a steal from a local overstock home improvement store (Hoods for the locals) and laid out all three walls. There was quite the variation in the marble’s veining so I wanted it to look purposeful. Then we got to work measuring, cutting and installing the tile. I cut the tile with a wet saw while Tim installed the rows.
We used the same spacers we had from tiling the kitchen and actually bought the same grout as in the kitchen. Using pre-mix grout just makes tiling projects so much easier. After grouting, we did seal the tile. I saw a lot of back and forth on whether to seal marble tile or not, but we decided to give it a couple coats of sealer. Between the mortar and the sealer, the tile DID dull a bit and was no longer as bright looking as when we bought it. At first I was super bummed about this but now there’s more contrast to the veining. One of my favorite things in the whole bathroom is actually the light/exhaust fan in the shower – it’s also a bluetooth speaker! The fan is on the quieter side and it’s fun to have tunes playing while using the shower.
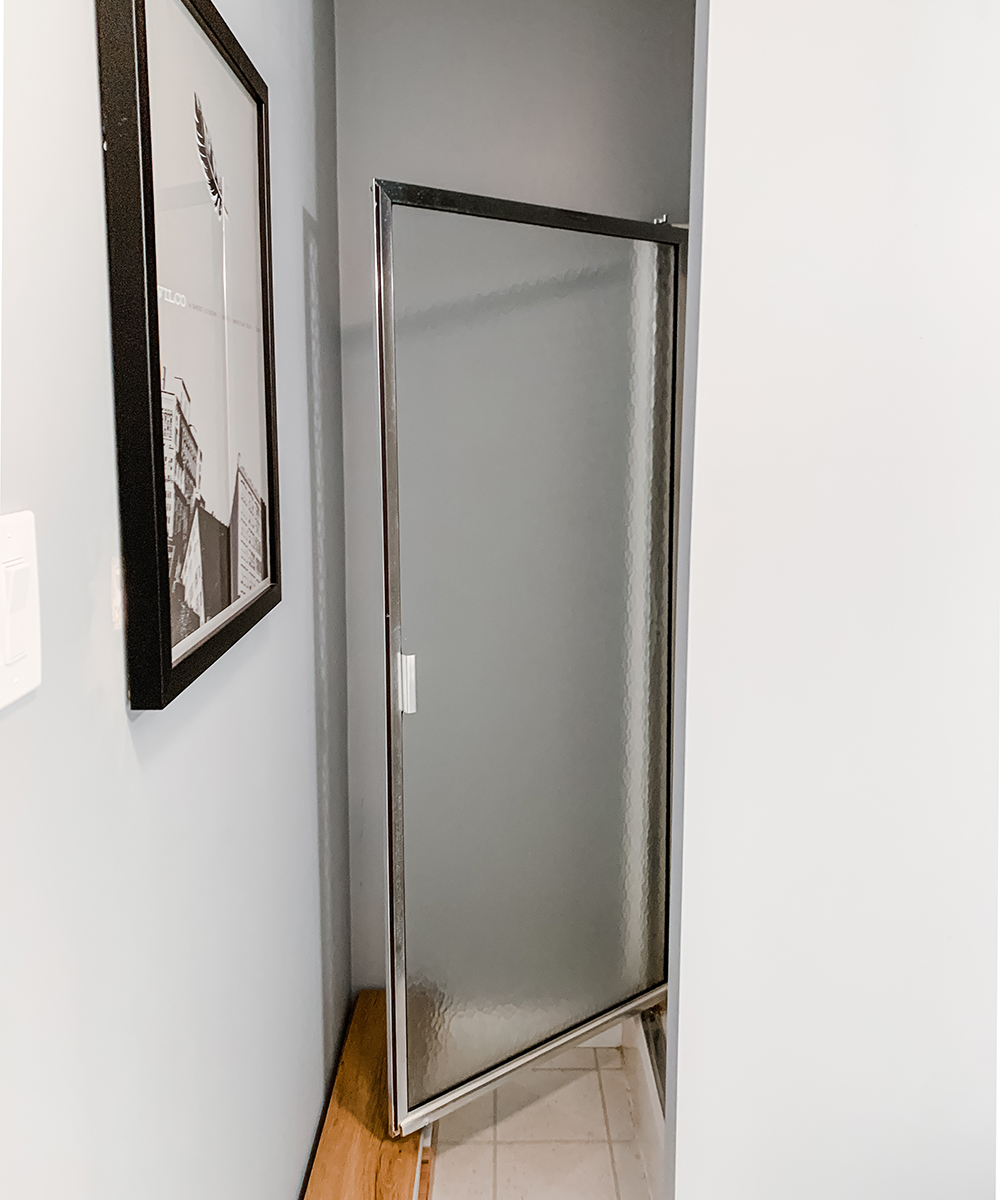
We did hire out the shower door – the ONLY thing we had to tire out with this project! We got quotes on a single sliding door, double sliding door and a swing door. The swing door was the cheapest option and design-wise was the most minimal so that is what we moved forward with. The door swings in and out, making access easier. We were worried that having to reach in to turn on the shower would be a pain (hence the consideration of a double sliding door), but it really hasn’t been. Plus, this shower rarely gets used with it being in the basement. We bought this squeegee and it’s amazing. It just feels high-end to use. At the end of it all, I love how the shower turned out.
So, let’s recap where we started with the bathroom when we first bought the house:
And how it finally looks today!

Through all of the product delays, the procrastination, the research, the pivoting, trial and errors – we love how this bathroom has turned out. 🙂
Materials Used:
Color: Behr Submarine Gray
Shiplap
Shower pan (ordered custom through a local shop)
Bluetooth ceiling light & exhaust vent
Grout
Shower head
Squeegee
Toilet
Vanity
Faucet
Acrylic vanity pulls
Mirror
Light
Towel ring
TP holder
Towel/robe hooks
Black frames
Trash can
Flooring
Some links above are affiliate links.