
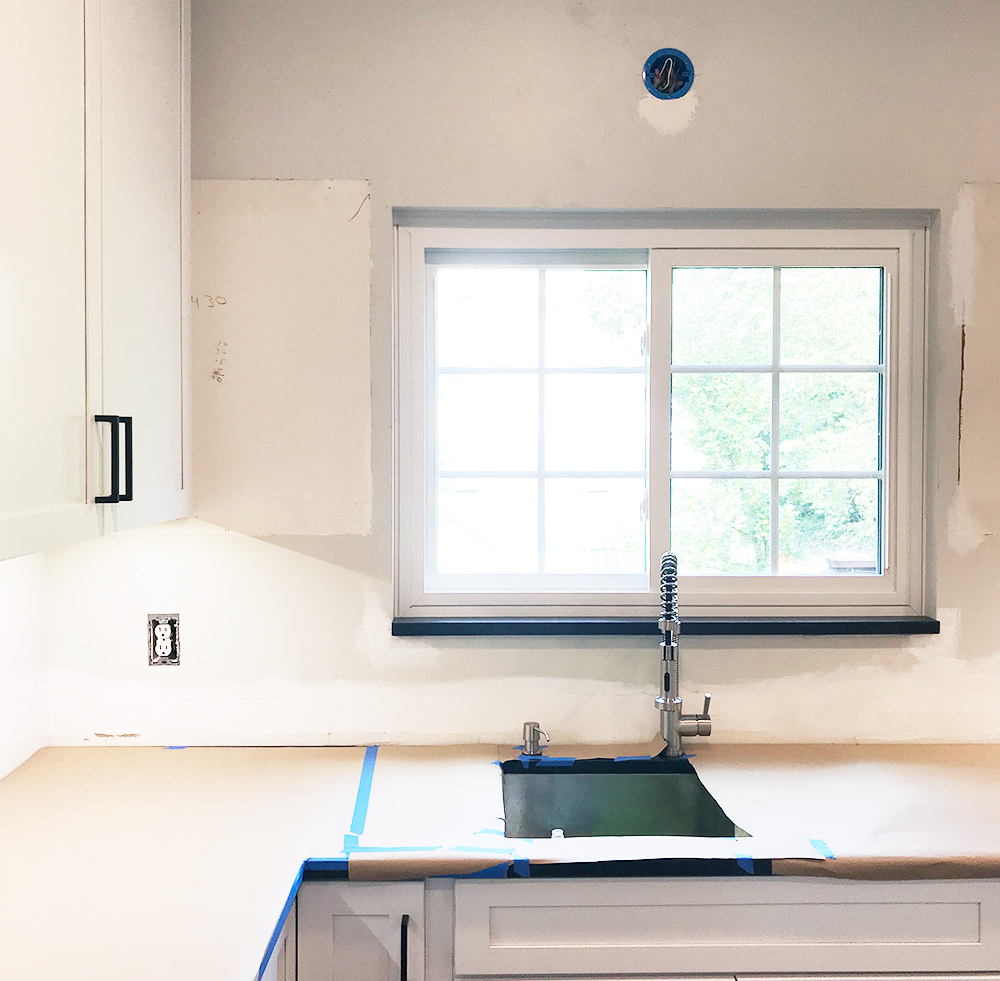
We are on the home stretch of our kitchen renovation!
Cabinets, countertops, hardware, new appliances, electric – check, check, check! The last few items on the list are the tile, crown molding around the upper cabinets and finding the perfect light fixture for over the sink.
When it came to picking out tile, I only had two styles in mind: marble or white subway. The finishes we’ve picked out for this kitchen are so simple and, in my opinion, classic that I didn’t want anything loud. I want it all to blend and look purposeful.
After looking at a few marble options and seeing the variations that come with marble–color and pattern–we ultimately decided that subway tile was the way to go. Plus, marble costs significantly more than regular subway tile.
Before even picking out the tile I knew that I wanted to take it to the ceiling vs having a traditional backsplash that stops at the bottom of the upper cabinets. Though subway tile is simple, it can also make a statement! So we bought several boxes of tile and all of the supplies and got to work!
Supplies
Subway Tile
Bullnose Wall Tile
Window Casing Tile
Spacers
Premix Thin-Set Mortar
Grout – (in the Warm Gray color)
Trowels – Small/Flat & V-Notch
Tile Wet Saw or Cutter (we were able to borrow my father-in-law’s wet saw)
Install
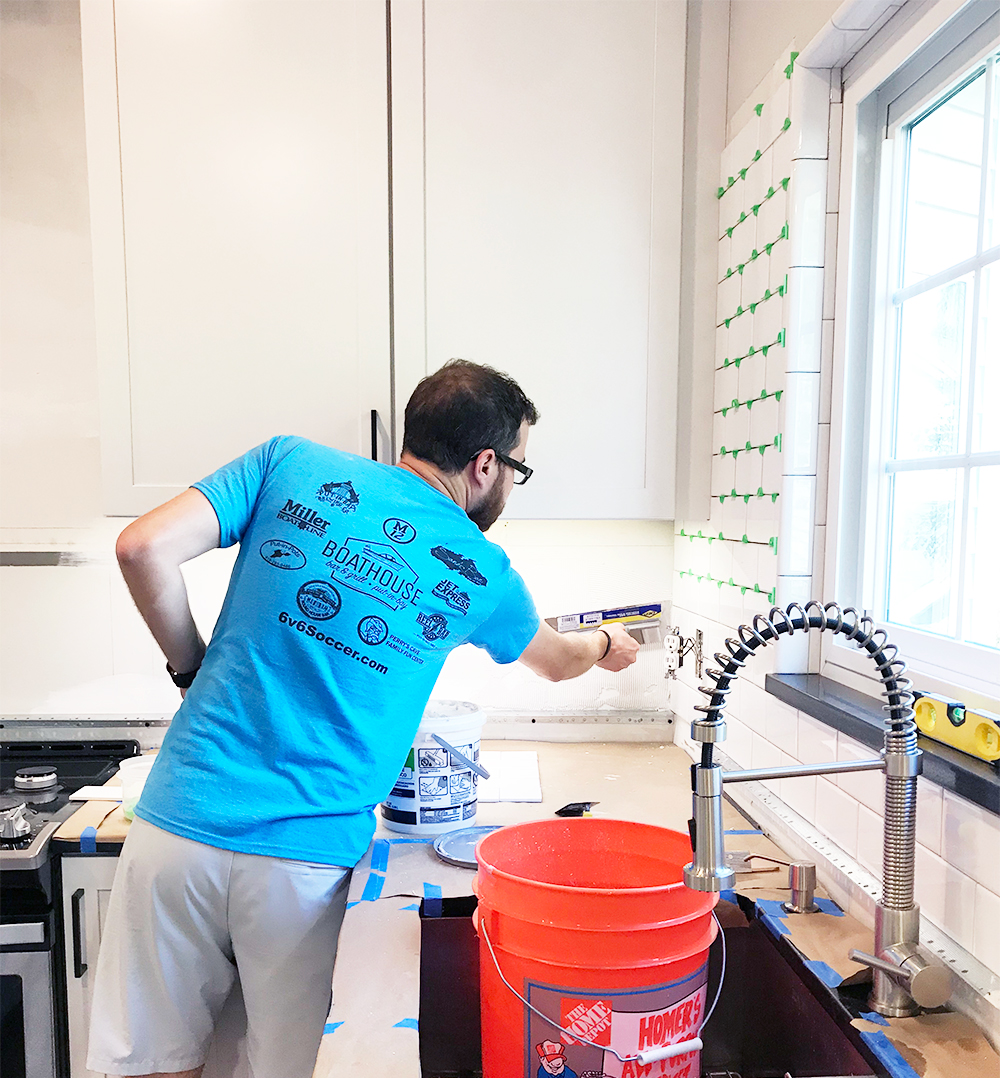
Though installing tile isn’t terribly hard, it’s really easy to end up with crooked rows when working with individual pieces vs sheets of tile. The first row really sets the tone for the entire install, so in order to get the first row even we installed a ledger board to start. (It’s that metal strip screwed into the wall in the photo above.) We put the ledger board one row up from the countertops to account for any unevenness with the install of the cabinets and countertop. (In a perfect world everything would be level and you wouldn’t have to worry about this, but that’s not the case when you have a house that’s settled. You get it as close as you can and fake what you can’t!) We found this video super helpful to watch before we started and basically followed those instructions for installing the tile.
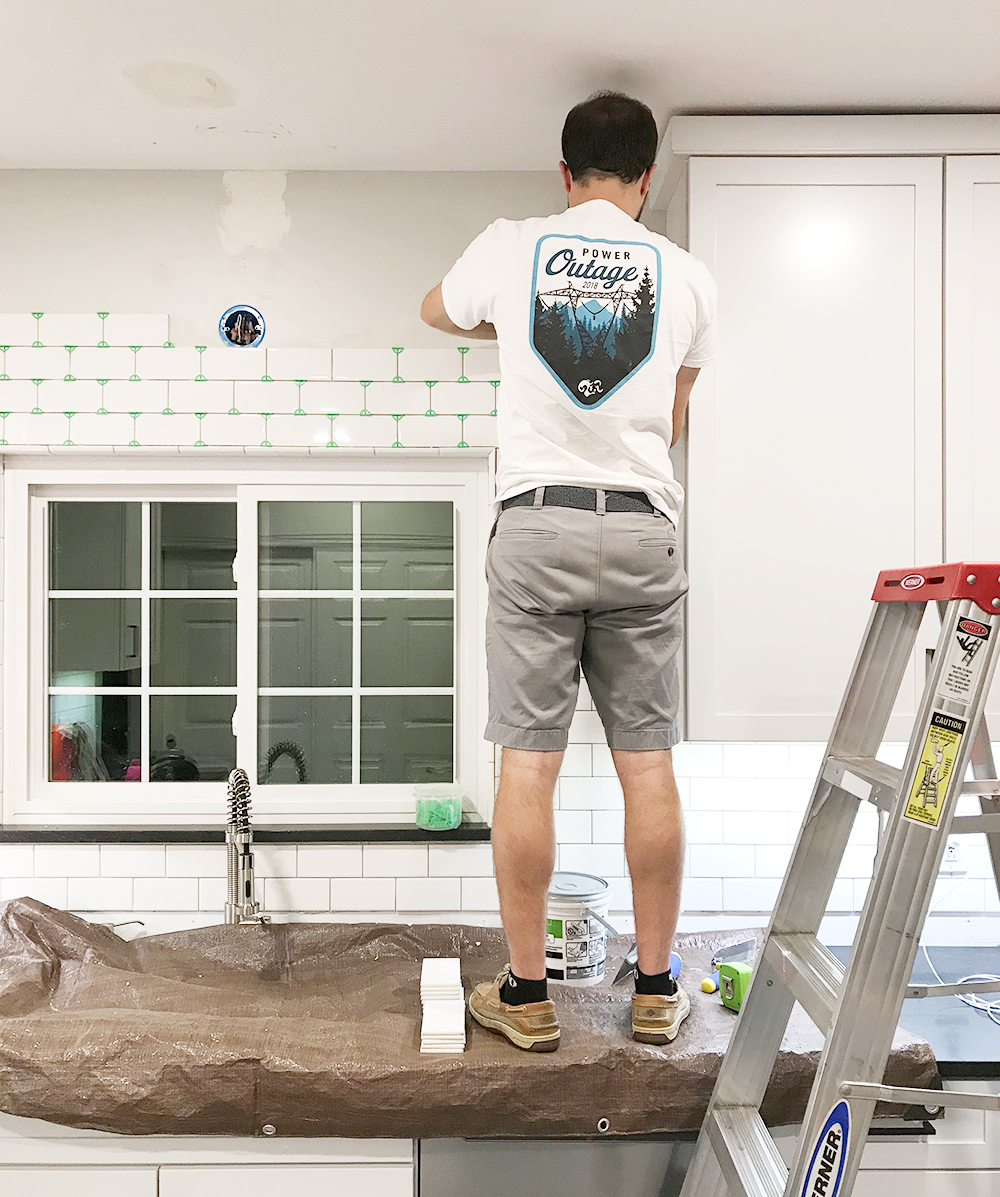
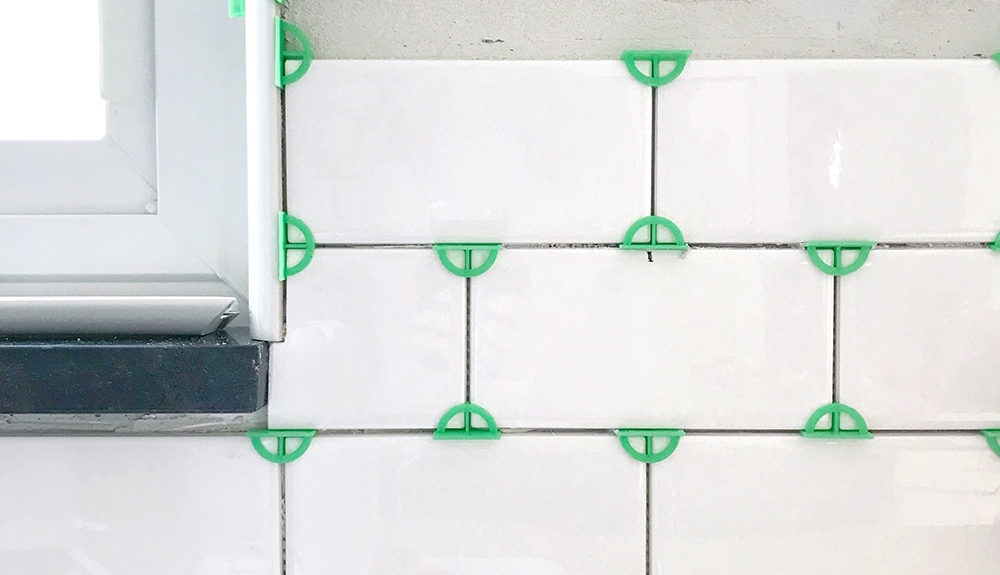
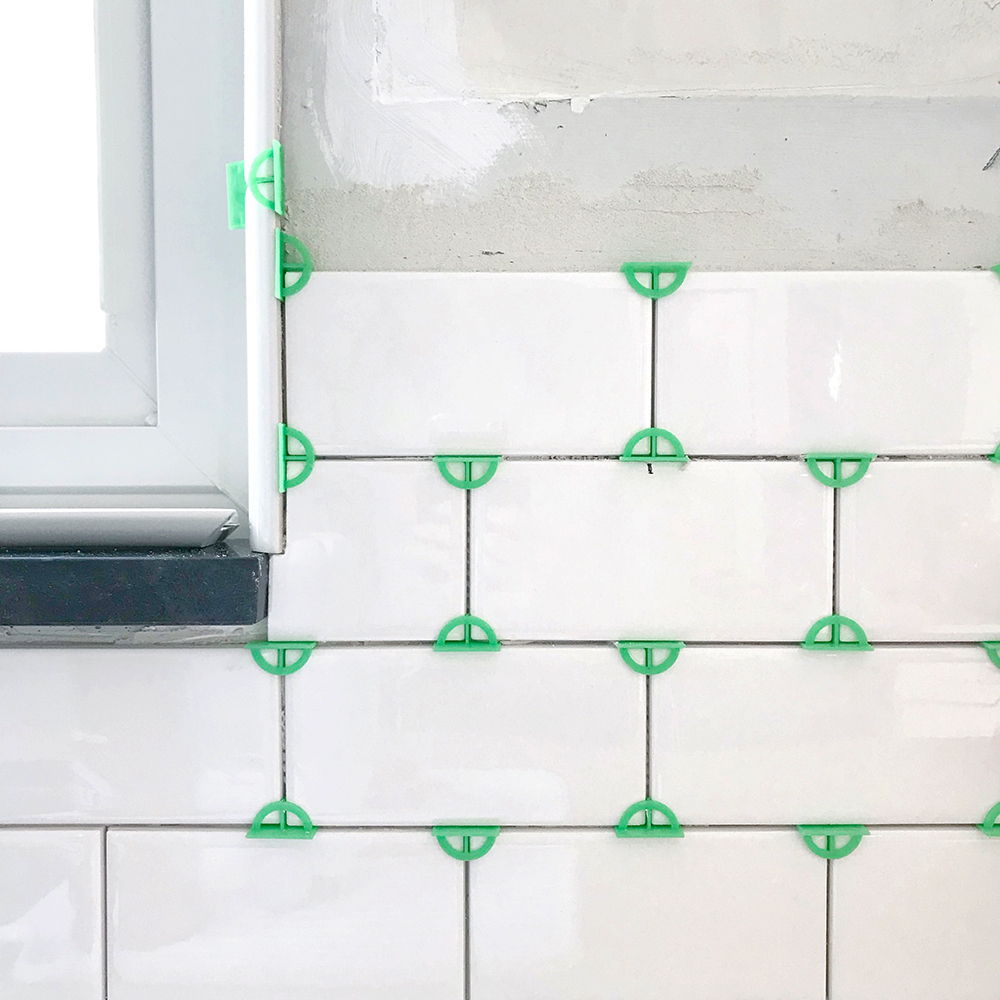
We then planned out the tile and anticipated where the cuts were going to be needed. We didn’t want to end up with tiny slivers of tile anywhere. From there, it’s spreading on the thin-set with the v-notch trowel and putting on the tile. We had a system of installing several tiles and then going back and placing the spacers. For us it was more time efficient. Because the tiles we went with did not have the spacers build in (also know as “lugged”), we went with a 1/16″ grout line.
We weren’t quite sure how we wanted to deal with the window – frame it out? Tile the casing? Put a quarter-round piece on the corner? I didn’t want any type of boarder around the outside of the window, so we bought curved tile to wrap the edges. I really like how it turned out.
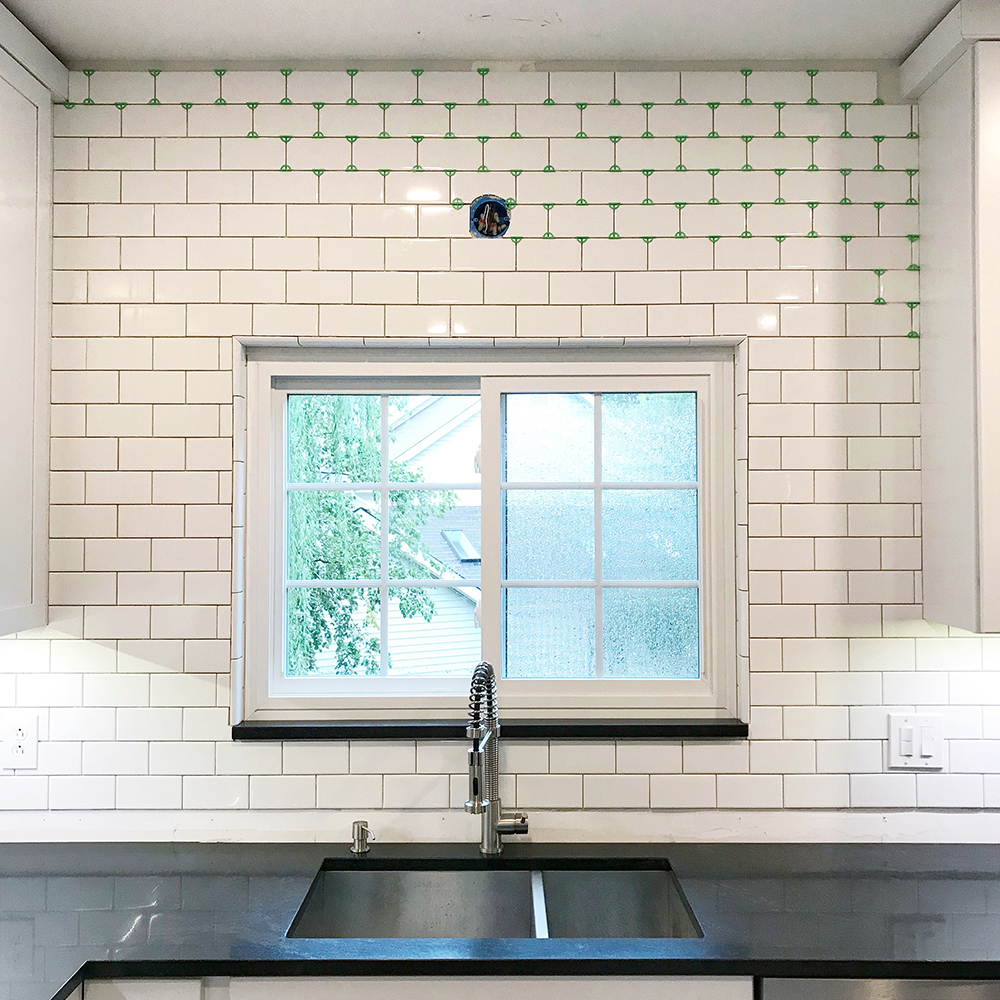
We have the final two rows left to install on each wall, along with the bullnose pieces for the sides. We’ll have to clean up any thin-set that may have came through the grout lines before we can actually grout. Speaking of grout…we’re doing a medium-light gray grout. White grout is too stark for me and while I love black grout it would have felt too match-y with the countertops. I am so excited and happy with how the backsplash has turned out! I’ll be doing a big kitchen reveal post once it’s all finished. Stay tuned!